Subaru Legacy BN/BS (2015-2019) Service Manual: Inspection
• Inspect the drive plate facing for wear and damage. • Driven plate for discoloration (burned color) • Make sure the snap ring is not worn and the return spring has no permanent distortion, damage, or deformation. • Check the lip seal for damage. • Inspect the extension end play, and adjust it to within the standard value. Transfer Clutch > ADJUSTMENT 1. Before measuring clearance “A” between snap ring and retaining plate, place same thickness shims on both sides to prevent the retaining plate from tilting. 2. When clearance “A” exceeds the limit for use, replace the drive plate and driven plate as a set, and select the pressure plate within the initial specified value. Initial standard: 0.7 — 1.1 mm (0.028 — 0.043 in) Limit thickness: 1.6 mm (0.063 in)
3. Check for tight corner braking phenomenon when the vehicle is moved forward with the steering fully turned. If tight corner braking occurs, perform the following procedures. NOTE: Turn OFF the X mode switch and perform inspection. (1) With the steering wheel held at fully turned position, drive the vehicle in “D” range and with vehicle speed at approx. 5 km/h (3 MPH) in both clockwise and counterclockwise directions for approx. ten times each, while repeating acceleration and braking intermittently. (2) If the tight corner braking phenomenon still persists, drive the vehicle again in a circle for several laps. |
 Installation
1. Apply CVTF to the seal ring and attach it to the seal ring groove of transfer clutch assembly.NOTE:• Use new seal rings.• When installing the seal rings, do not expand the seal rings to ...
 Disassembly
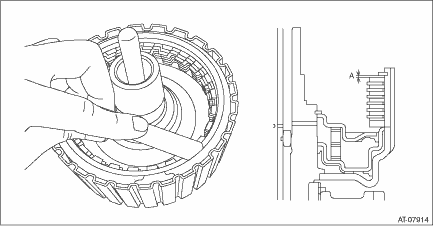
1. Remove the snap ring, and then remove the retaining plate, drive plate and driven plate.(A)Snap ring2. Using the ST, remove the snap ring.ST 18762AA001COMPRESSOR SPECIAL TOOL(A)Snap ring(B)Trans ...
Other materials:
Removal
1. SEDAN MODELRemove the clips and detach the side garnish assembly.2. OUTBACK MODEL1. Remove the clips and detach the side garnish assembly.(1)Double-sided tape(3)Garnish ASSY rear door(5)Side sill garnish ASSY(2)Garnish ASSY front door(4)Garnish ASSY rear quarter 2. Remove the garnish assembly - ...
