Subaru Legacy BN/BS (2015-2019) Service Manual: Installation
CAUTION: • For installation of the stereo camera cover, refer to “INSTALLATION”, “Stereo Camera” in the “EyeSight” section and observe the precautions for installation. Stereo Camera > INSTALLATION • When reusing the tether clip on the upper part of the trim panel - front pillar UPR, check that there is no damage to the tether clip. If the tether clip is damaged, always replace it with a new tether clip. If the tether clip is damaged, its holding force is reduced and the trim panel - front pillar UPR may come off. • Do not reuse the tether clip removed from the upper part of the trim panel - front pillar UPR. Always replace with a new part. • Before installing the trim panel - front pillar UPR, check the condition of protective non-woven fabric (white) of the curtain airbag. If it is damaged (airbag module cloth is exposed), replace the curtain airbag module assembly with a new part. • If the hook - rear seat is disconnected from the vehicle body, make sure to replace the hook - rear seat with a new part to prevent the decline of the fixed force of the seat.
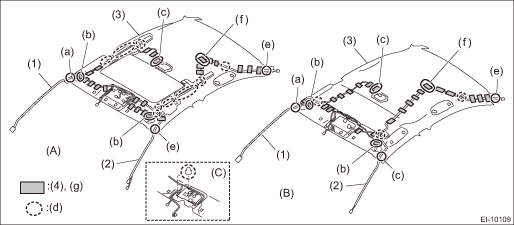
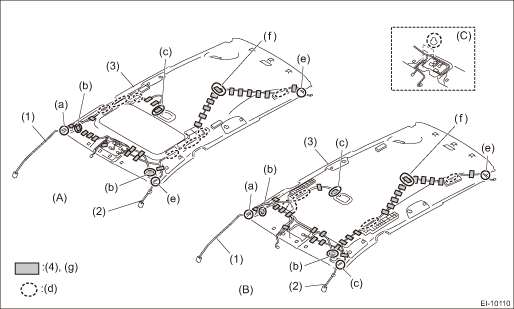
1. Install the trim panel - roof assembly. (1) Bring the trim panel - roof assembly inside the vehicle. (2) Attach the feeder cord and roof cord to the roof trim. CAUTION: Route each cord carefully. The cord may interfere, thus preventing normal deployment of the curtain airbag when necessary. Tape: Item number: 86359SC000/TAPE NOTE: Use the tape (service parts) by cutting into 80 mm - 50 mm (3.1 in - 2.0 in).
(3) Secure the trim panel - roof assembly with the clips. 2. Install the garnish - roof. (Model with sunroof) 3. Install the assist rail. 4. Install the light assembly - room. 5. Install the sun visor assembly. Tightening torque: 2 N·m (0.2 kgf-m, 1.5 ft-lb) 6. Install the overhead console. (Models without EyeSight) 7. Install the stereo camera cover assembly. (Models with EyeSight) Stereo Camera > INSTALLATION 8. Install the trim panel - rear pillar UPR. 9. Install the upper inner trim. Tightening torque: Trim panel - center pillar UPR: 7.5 N·m (0.8 kgf-m, 5.5 ft-lb) Front seat belt anchor: 30 N·m (3.1 kgf-m, 22.1 ft-lb) 10. Install the lower inner trim. 11. Install the side pad assembly - backrest. Tightening torque: 53 N·m (5.4 kgf-m, 39.1 ft-lb) 12. Install the rear seat cushion assembly. 13. Install the console box assembly and cover - shift lever. (Sedan model) Tightening torque: 6.5 N·m (0.7 kgf-m, 4.8 ft-lb) 14. Install the front seat. (Sedan model) Front Seat > INSTALLATION 15. Install each part of rear doors. (Sedan model) • Checker ASSY - rear door Tightening torque: 33 N·m (3.4 kgf-m, 24.3 ft-lb) • Rear door trim assembly • Rear speaker assembly 16. Connect the ground terminal to battery sensor. NOTE |
 Removal
1. SEDAN MODELCAUTION:• Refer to “CAUTION” of “General Description” before handling the airbag system components. General Description > CAUTION• If the hook - rear ...
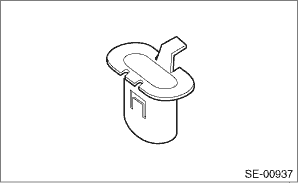
 Side garnish
...
Other materials:
Removal
CAUTION:Refer to “CAUTION” of “General Description” before handling the airbag system components. General Description > CAUTION1. Turn the ignition switch to OFF.2. Disconnect the ground terminal from the battery sensor, and wait for at least 60 seconds before starting work. ...
