Subaru Legacy BN/BS (2015-2019) Service Manual: Installation
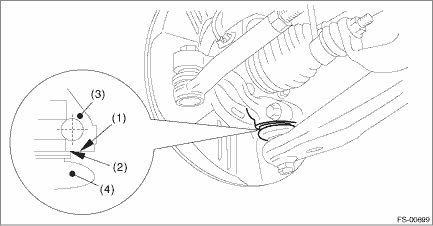
1. Before installation, inspect the following items and replace any faulty part with a new one. • Check the front arm for damage or cracks, and replace if defective. • Visually check the bushing for abnormal cracks, fatigue or damage. • Visually check the boot on the ball joint for damage. 2. Using new self-locking nuts, temporary tighten the front arm. 3. Install the ball joint into the housing assembly - front axle. CAUTION: Before tightening, make sure the bottom surface of the housing assembly - front axle and the stepped section of ball joint are in contact.
Tightening torque: 50 N·m (5.1 kgf-m, 36.9 ft-lb) 4. Install the front wheels. Tightening torque: 120 N·m (12.2 kgf-m, 88.5 ft-lb) 5. Unload the vehicle from lift, and tighten the bolt which secures the front arm to cradle with wheels in full contact with the ground and the vehicle at curb weight. Tightening torque: Front bushing side: 95 N·m (9.7 kgf-m, 70.1 ft-lb) Rear bushing side: 140 N·m (14.3 kgf-m, 103.3 ft-lb) 6. Inspect the wheel alignment and adjust if necessary. Wheel Alignment > ADJUSTMENT CAUTION: When the wheel alignment has been adjusted, perform the following adjustment. – Lane keep assist learning value clear (model with EyeSight): Clear Active Lane Keep System Learning Value > OPERATION – VDC sensor midpoint setting mode: VDC Control Module and Hydraulic Control Unit (VDCCM&H/U) > ADJUSTMENT 7. Perform reinitialization of the auto headlight beam leveler system. (Model with auto headlight beam leveler) Auto Headlight Beam Leveler System > PROCEDURE |
 Assembly
1. BUSHING FRONT - FRONT ARM1. Before assembly, inspect the following items and replace any faulty part with a new one.• Check the front arm for damage or cracks, and replace if defective.• ...
 Disassembly
1. BUSHING FRONT - FRONT ARM1. Put an alignment mark on the front arm assembly based on the split portion of the bushing intermediate plate of the busing front - front arm.CAUTION:Always put an alignm ...
Other materials:
Installation
CAUTION:Install the mud guard - front so that the front end of the mud guard (b) comes outside the bumper face - front (a).1. Install the fog light assembly - front.2. Install the mud guard - front.3. Lower the vehicle.4. Connect the ground terminal to battery sensor. NOTE5. Adjust the fog light be ...
