Subaru Legacy BN/BS (2015-2019) Service Manual: Installation
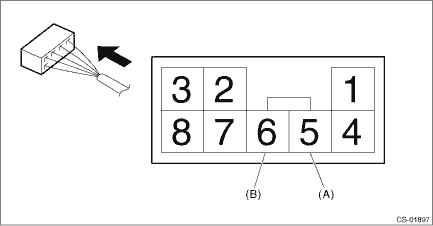
1. Insert the indicator light terminal to the harness connector.
2. Install the housing and the blind.
3. Install the harness to the select cover COMPL.
4. Install the harness connector to the select cover COMPL.
5. Install the indicator cover.
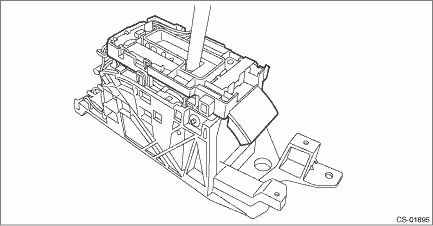
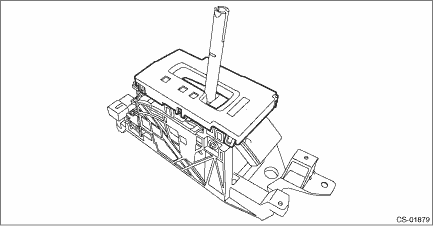
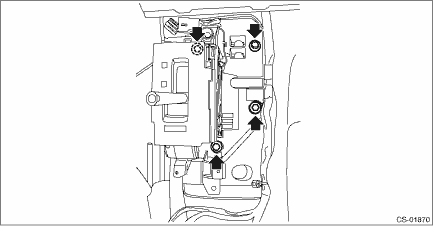
6. Install the select lever COMPL after setting it to the vehicle body. Tightening torque: 18 N·m (1.8 kgf-m, 13.3 ft-lb)
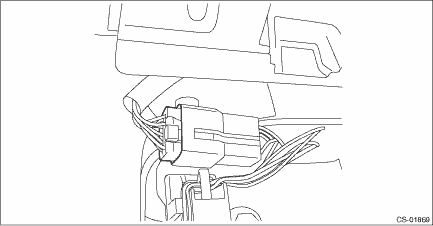
7. Connect the harness connector.
8. Install the harness clip to the select lever COMPL.
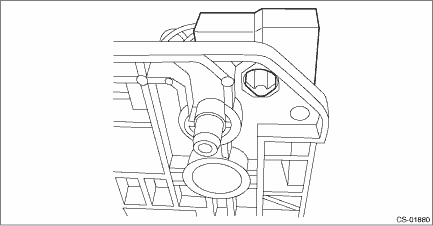
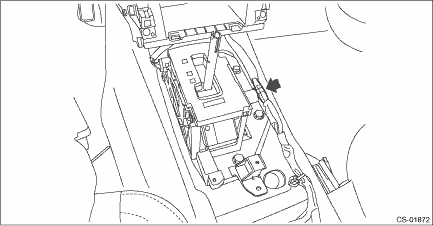
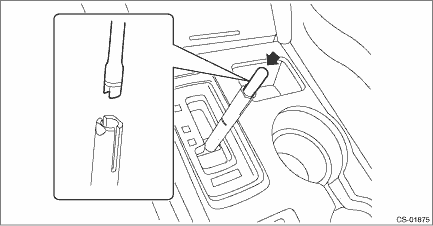
9. Shift the select lever to “N” range. 10. Install the console front side cover assemblies RH and LH. Console Box > INSTALLATION 11. Install the console box. Console Box > INSTALLATION 12. Install the console front cover assembly. Console Box > INSTALLATION 13. Insert the rod COMPL in the direction shown in the figure. CAUTION: Be careful not to insert the rod COMPL in the wrong direction by 90°.
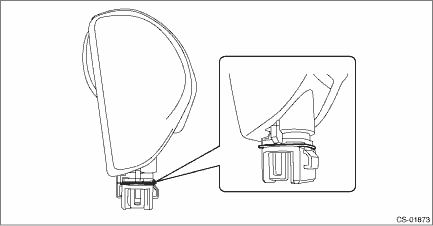
14. Install the clamp grip pin to the grip.
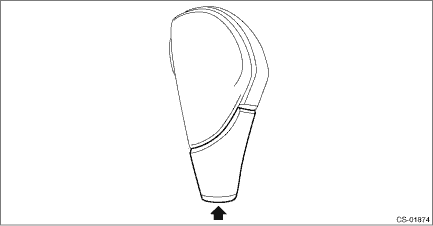
15. Install the cover grip AT securely. NOTE: After installation, check that the cover grip AT cannot be detached.
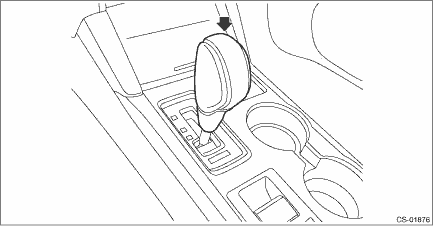
16. Insert the grip assembly to the select lever and press it down until a click is heard.
17. After installation of grip, check the following points. • The grip will not come off. • The button on the grip operates normally. • Make sure that the select lever will not shift to another range unless the button on the grip is pressed. NOTE: If it shifts to another range with the button not pressed, check if the rod COMPL is inserted in the wrong direction. 18. Lift up the vehicle. 19. Shift the range select lever to “N” range. 20. Secure the cable to the bracket. Select Cable > INSTALLATION 21. Adjust the select cable position. Select Cable > ADJUSTMENT 22. After adjustment, confirm that the select lever operates properly at all range positions using the shift lock release button. 23. Install the center exhaust cover. Tightening torque: 18 N·m (1.8 kgf-m, 13.3 ft-lb) 24. Install the center exhaust pipe. (2.5 L model) Center Exhaust Pipe > INSTALLATION 25. Install the front exhaust pipe and rear exhaust pipe. (3.6 L model) Front Exhaust Pipe > INSTALLATION Rear Exhaust Pipe > INSTALLATION 26. Connect the ground terminal to battery sensor. NOTE 27. Inspect the following items. If a malfunction is found in the inspection, adjust the select cable or inhibitor switch. (1) The shift lock operates normally. AT Shift Lock Control System > INSPECTION (2) Engine starts when the select lever is in “P” or “N” range, but not in other ranges. (3) Back-up light illuminates when the select lever is in the “R” range, but not in other ranges. (4) Select lever and indicator positions are matched. (5) Make sure that the door open alarm will not sound when the door is opened in the “P” range after the ignition switch is turned to OFF. NOTE: If the door open alarm sounds, check if the rod COMPL is inserted in the wrong direction. |
 Inspection
1. The shift lock operates normally. AT Shift Lock Control System > INSPECTION2. Engine starts when the select lever is in “P” or “N” range, but not in other ranges.3. Back-up ...
 Cooling(h4do)
...
Other materials:
Operation
Check the operating condition of each sensor in the event of malfunction in the seat belt buckle switch, or when the seat belt buckle switch has been replaced.1. On «Start» display, select «Diagnosis».2. On «Vehicle selection» display, input the target vehicle information and select «Confirme ...
