Subaru Legacy BN/BS (2015-2019) Service Manual: Removal
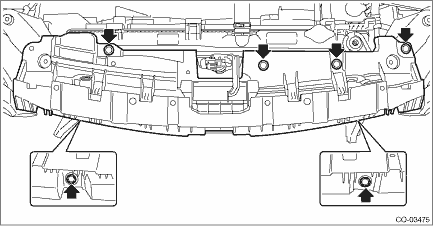
CAUTION: The radiator is pressurized when the engine and radiator are hot. Wait until engine and radiator cool down before working on the radiator. 1. Disconnect the ground terminal from battery sensor. NOTE 2. Remove the air intake duct. Air Intake Duct > REMOVAL 3. Remove the front bumper. Front Bumper > REMOVAL 4. Remove the active grille shutter. Active Grille Shutter > REMOVAL 5. Remove the grille bracket. NOTE: Remove six clips when removing the grille bracket.
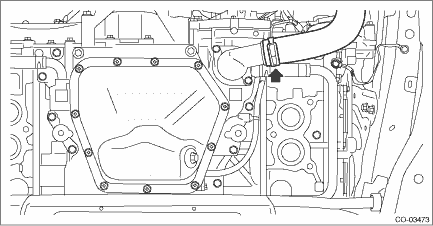
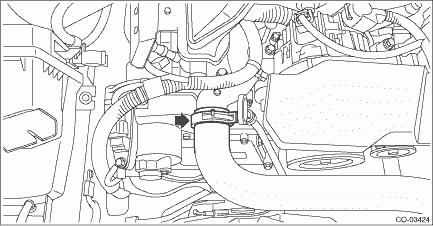
6. Drain engine coolant. Engine Coolant > REPLACEMENT 7. Remove the front exhaust pipe. Front Exhaust Pipe > REMOVAL 8. Disconnect the radiator outlet hose from thermostat cover.
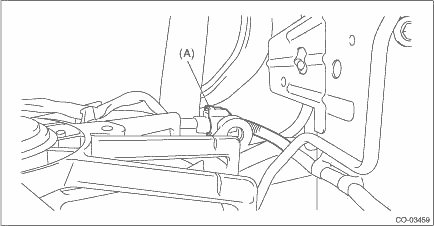
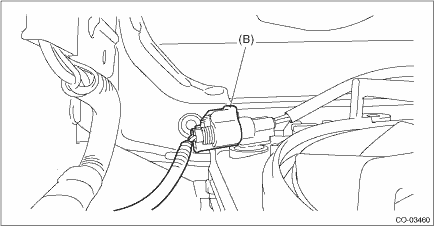
9. Lower the vehicle. 10. Remove the reservoir tank. Reservoir Tank > REMOVAL 11. Disconnect the connector (A) from the radiator main fan motor and the connector (B) from the radiator sub fan motor.
12. Disconnect the radiator inlet hose from the water pipe assembly.
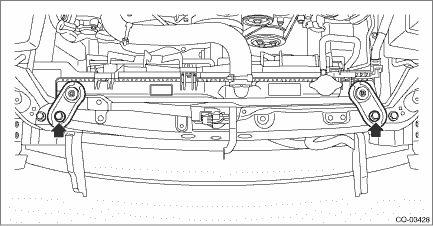
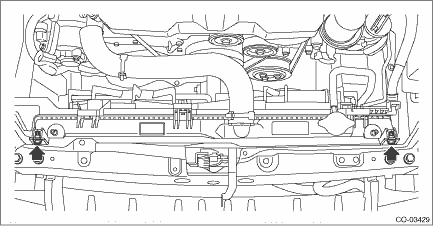
13. Remove the radiator upper brackets.
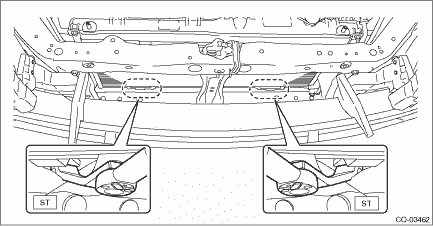
14. Using the ST, remove the bolts securing the condenser lower bracket to the radiator.
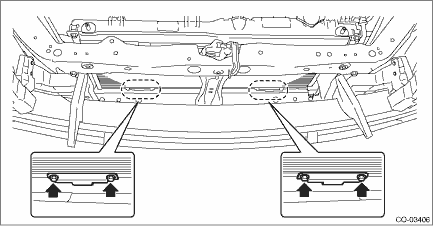
15. Remove the bolts securing the condenser lower bracket to the condenser, and remove the condenser lower bracket. NOTE: This procedure is required to prevent the lower gasket from being damaged when removing the radiator.
16. Remove the bolts securing the condenser upper bracket to the radiator.
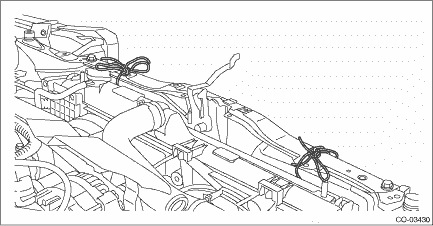
17. Secure the condenser to the vehicle using ropes or other means. NOTE: This procedure is required to prevent the condenser from dropping off and also damage to the air conditioner pipes.
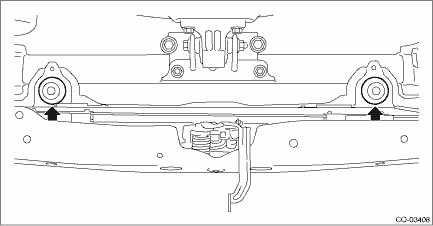
18. Lift the radiator up and away from vehicle. 19. Remove the radiator lower cushion from the vehicle body.
|
 Radiator
...
 Inspection
1. Check that the radiator does not have deformation, cracks or damage.2. Check that the hose has no cracks, damage or loose part.3. Remove the radiator cap, fill the radiator with engine coolant, and ...
Other materials:
Preparation tool
1. SPECIAL TOOLILLUSTRATIONTOOL NUMBERDESCRIPTIONREMARKS99099AJ000ENGINE HANGER• Used for hanging power unit.• Used together with CHAIN BALANCER (99099AJ010).99099AJ010CHAIN BALANCER• Used for hanging power unit.• Used together with ENGINE HANGER (99099AJ000).18360AA020HANGER ...
