Subaru Legacy BN/BS (2015-2019) Service Manual: Removal
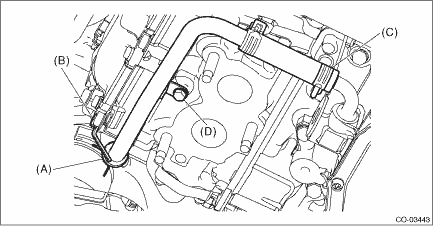
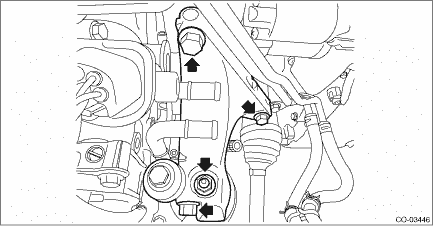
1. WATER PIPE ASSEMBLY RH 1. Disconnect the ground terminal from battery sensor. NOTE 2. Drain engine coolant. Engine Coolant > REPLACEMENT 3. Remove the front exhaust pipe. Front Exhaust Pipe > REMOVAL 4. Disconnect the engine coolant hose (A) from the water pipe assembly RH, and remove the bolt (B) securing the water pipe assembly RH to the cam carrier RH. 5. Disconnect the water pipe hose RH (C) from the oil pan. 6. Remove the bolt (D) securing the water pipe assembly RH to the cam carrier RH to remove the water pipe assembly RH.
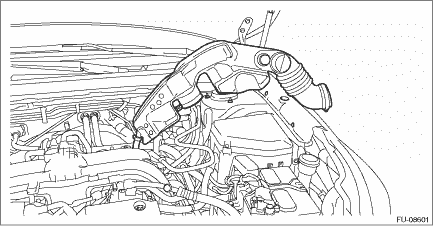
2. WATER PIPE ASSEMBLY LH 1. Disconnect the ground terminal from battery sensor. NOTE 2. Fully open the front hood. NOTE 3. Remove the air intake duct. Air Intake Duct > REMOVAL 4. Remove the clip (A), and loosen the clamps (B) and (C) securing the air intake boot.
5. Remove the air intake boot from the air cleaner case (rear) and throttle body, and move it to the left side wheel apron.
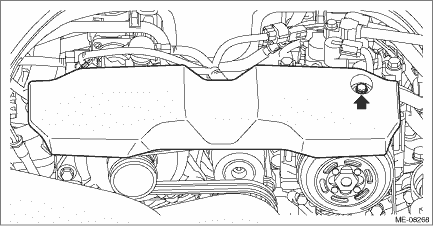
6. Remove the V-belt covers.
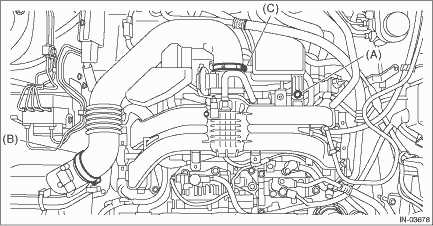
7. Drain engine coolant. Engine Coolant > REPLACEMENT 8. Remove the front exhaust pipe. Front Exhaust Pipe > REMOVAL 9. Lower the vehicle. 10. Remove the universal joint. Universal Joint > REMOVAL 11. Disconnect the heater inlet hose (A), heater outlet hose (B) and water pipe (C).
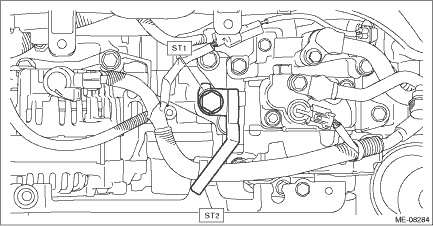
12. Using the ST1, install the ST2 to the engine unit.
Tightening torque: 43 N·m (4.4 kgf-m, 31.7 ft-lb)
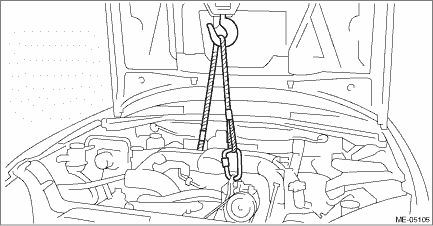
13. Support the engine with a lifting device and wire ropes.
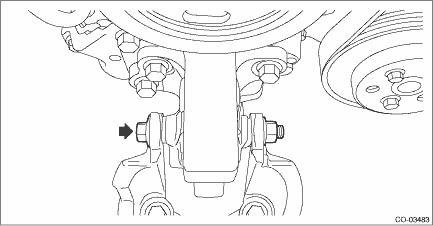
14. Remove the nuts from the transmission mounting bracket RH.
15. Remove the bolts and nuts that connect the front mounting bracket and engine mounting bracket.
16. Remove the transmission mounting bracket LH.
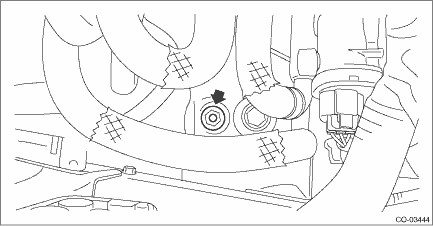
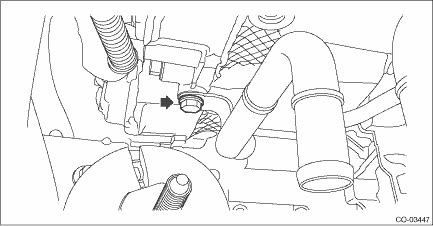
17. Remove the bolt from the water pipe assembly LH.
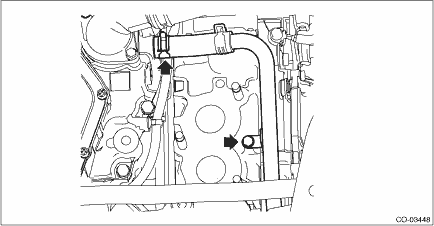
18. While raising the engine unit slightly, remove the bolt from the water pipe assembly LH. CAUTION: When lifting up the engine, pay attention to the clearance of each part and be careful not to lift the engine too much, in order to prevent damaging the vehicle. 19. Disconnect the water pipe hose LH, and remove the water pipe assembly LH.
|


 Inspection
1. Check that the water pipe assembly has no deformation, cracks or other damages.2. Check that the hose has no cracks, damage or loose part. ...
Other materials:
Replacement
CAUTION:• Before handling the airbag system components, refer to “CAUTION” of “General Description” in “AIRBAG SYSTEM”. General Description > CAUTION• Do not allow harness and connectors to interfere or get tangled up with other parts.• If the s ...
