Subaru Legacy BN/BS (2015-2019) Service Manual: Assembly
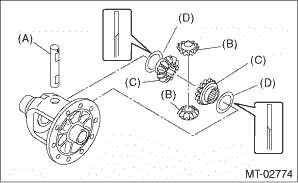
1. DIFFERENTIAL CASE ASSEMBLY 1. Install the differential bevel gear and differential bevel pinion together with adjusting washer, and insert the pinion shaft. NOTE: Face the chamfered side of adjusting washer toward differential bevel gear.
2. Measure the backlash between the differential bevel gear and differential bevel pinion. Adjust the backlash if not within specified limit. Front Differential Assembly > INSPECTION NOTE: Be sure the differential bevel pinion gear teeth contact adjacent gear teeth during measurement. Standard backlash 0.13 — 0.18 mm (0.0051 — 0.0071 in)
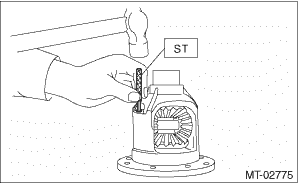
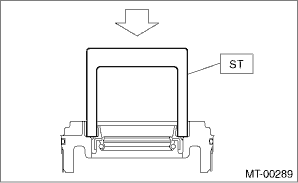
3. Align the pinion shaft pin hole with the differential case pin hole, and drive the straight pin into the holes from the hypoid driven gear side using the ST. NOTE: Use a new straight pin. After driving, crimp the area around the hole, and make sure that the straight pin will not come out.
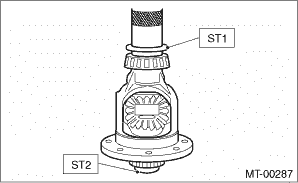
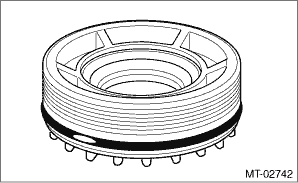
4. Install the taper roller bearing. CAUTION: Do not apply a load in excess of 10 kN (1 ton, 1.1 US ton, 1.0 Imp ton). NOTE: Be careful when handling because the taper roller bearing and the outer race are used as a set.
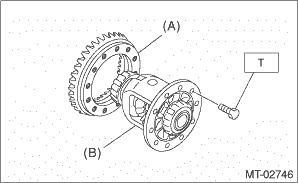
5. Install the hypoid driven gear using twelve bolts. Tightening torque: T: 62 N·m (6.3 kgf-m, 45.7 ft-lb)
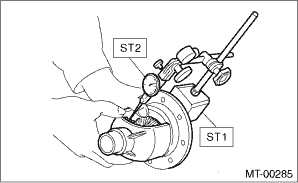
2. DIFFERENTIAL SIDE RETAINER 1. Using the ST, install the oil seal by lightly tapping with a plastic hammer. NOTE: • Use a new oil seal. • Apply transmission gear oil to the oil seal lips, and install the oil seal while being careful not to deform the lip. • Check the identification marks (L, R), and attach the oil seals RH and LH.
2. Install the O-rings. NOTE: • Use new O-rings. • Apply transmission gear oil to O-ring. • Do not stretch or damage the O-ring. • Install the O-ring after hypoid driven gear backlash adjustment and completion of tooth contact inspection.
|
 Disassembly
1. DIFFERENTIAL CASE ASSEMBLY1. Loosen the twelve bolts and remove hypoid driven gear.(A)Hypoid driven gear2. Drive out the straight pin from differential assembly toward hypoid driven gear side.ST ...

Other materials:
Removal
1. SOLENOID UNIT1. Remove the select lever with the select cable connected. Select Lever > REMOVAL2. Remove the spacer and gasket. Select Lever > REMOVAL3. Remove the harness connector from the select lever COMPL.4. Remove the harness from the select lever COMPL.5. Raise the claw using a flat tip ...
