Subaru Legacy BN/BS (2015-2019) Service Manual: Removal
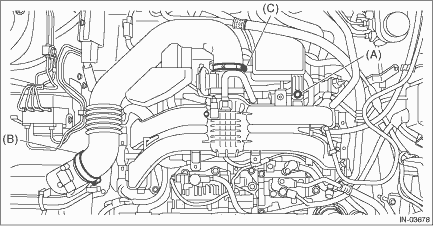
1. Disconnect the ground terminal from battery sensor. NOTE 2. Remove the air intake duct. Air Intake Duct > REMOVAL 3. Remove the clip (A) from the air intake boot. 4. Loosen the clamp (B) connecting the air intake boot and air cleaner case (rear). 5. Loosen the clamp (C) which connects the air intake boot and throttle body.
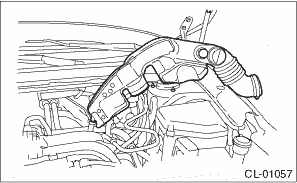
6. Remove the air intake boot from the throttle body, and move it to the left side wheel apron.
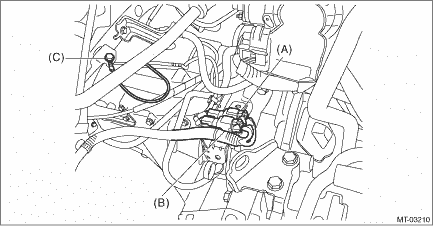
7. Disconnect the back-up light switch and the neutral position switch connectors, then remove the transmission radio ground cord terminal.
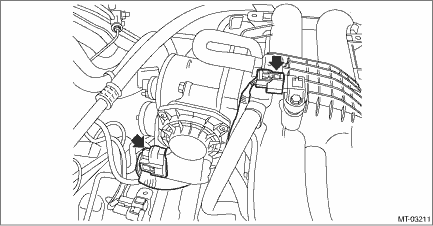
8. Disconnect the throttle position sensor harness connector and manifold pressure sensor harness connector.
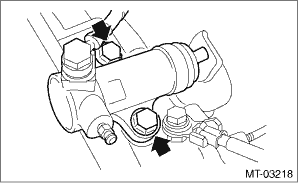
9. Remove the starter. Starter > REMOVAL 10. Remove the operating cylinder and suspend on a wire.
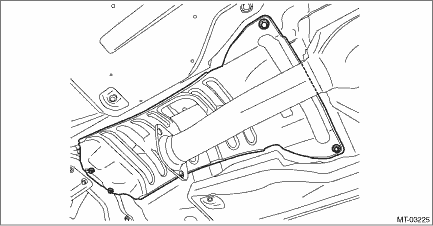
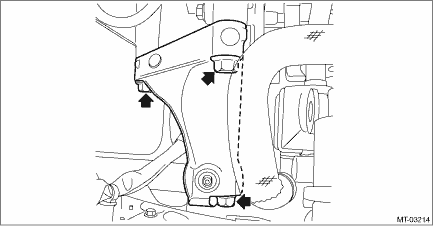
11. Remove the front wheels. 12. Lift up the vehicle. 13. Remove the front under cover. Front Under Cover > REMOVAL 14. Remove the center exhaust pipe (rear). Center Exhaust Pipe > REMOVAL 15. Drain transmission gear oil completely. Transmission Gear Oil > REPLACEMENT 16. Remove the center exhaust cover.
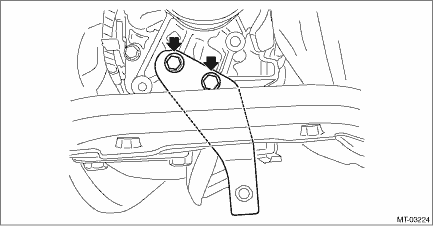
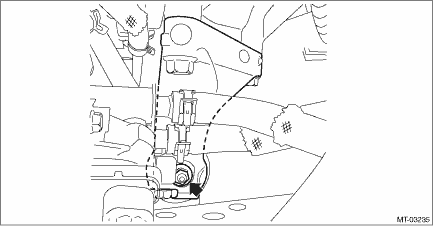
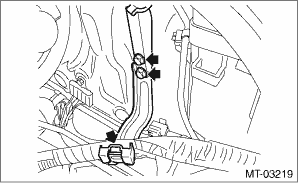
17. Remove the hanger bracket.
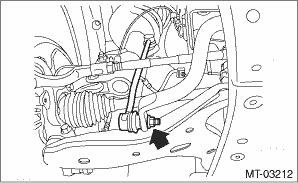
18. Remove the universal joint of the steering shaft. Universal Joint > REMOVAL 19. Remove the propeller shaft. Propeller Shaft > REMOVAL 20. Remove the MT gear shift cable and MT gear select cable from MT gear shift lever. MT Gear Shift Lever > REMOVAL CAUTION: • Do not bend MT gear shift cable and MT gear select cable at a sharp angle. • Disconnect the MT gear shift cable and MT gear select cable at the MT gear shift lever side. • Always use new MT gear select cable if the cable is removed from selector lever COMPL of transmission side. 21. Disconnect the stabilizer link.
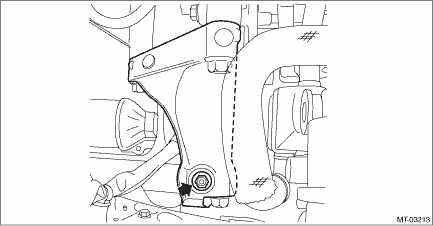
22. Remove the bolt securing the ball joint of the front arm to the housing, then separate the front arms and the housing.
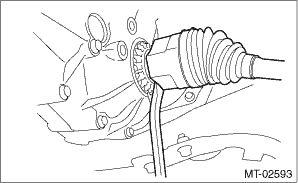
23. Using a crowbar, separate the left and right front drive shafts.
24. Lower the vehicle. 25. Remove the nuts connecting the engine mounting and the transmission main mounting bracket.
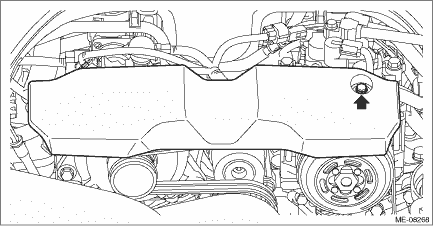
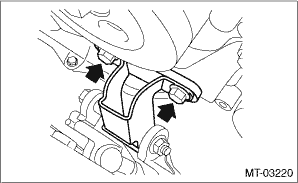
26. Remove the V-belt covers.
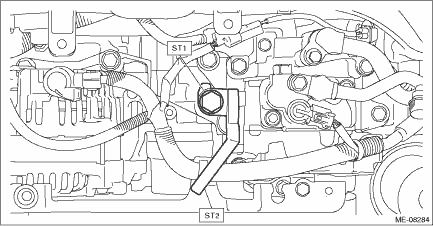
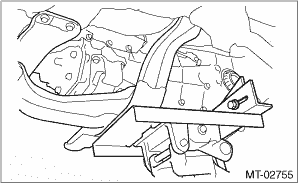
27. Using the ST1, install the ST2 to the engine unit.
Tightening torque: 43 N·m (4.4 kgf-m, 31.7 ft-lb)
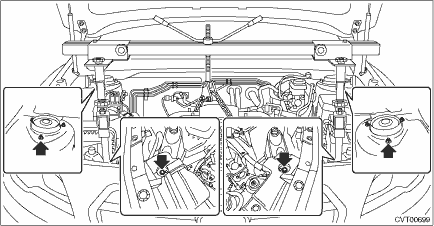
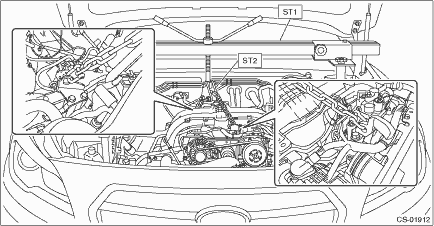
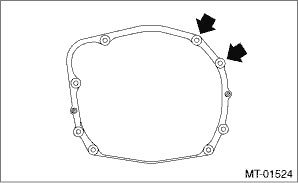
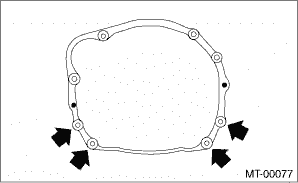
28. Set the ST1 and ST2 to vehicle. CAUTION: • Set the chain sling so that it does not contact the engine parts. • Install a bolt of φ8 mm (0.3 in) at the locations shown in the figure, and place the front side arms of ST (ENGINE HANGER). • Set the rear arms of ST (ENGINE HANGER) at the locations shown in the figure.
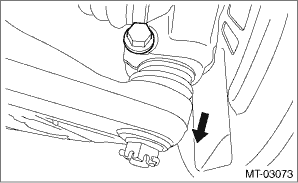
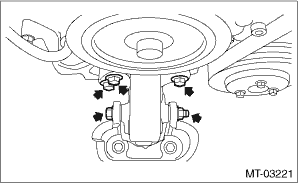
29. Lift the engine slightly and remove the bolts of front cushion rubber. 30. Remove the nut and bolt of the front cushion rubber, then remove the front cushion rubber.
31. Temporarily attach ST by using two bolts.
32. Lift up the engine unit high enough to install the bolt and nut to vehicle. CAUTION: • Do not lift up higher than enough level to install the ST to avoid damage to the hoses and pipes inside the engine room. • Do not tighten the bolts and nuts excessively, or the engine mounting bracket may be deformed. NOTE: If it is difficult to pull out the stud bolt from transmission main mounting bracket, shake the engine unit slightly while lifting up. 33. Tighten the mounting bolts on the engine side. Tightening torque: 25 N·m (2.6 kgf-m, 18.4 ft-lb)
34. Remove the ST (ENGINE HANGER). 35. Separate the battery cable clip to remove the bracket.
36. Remove the transmission main mounting bracket. NOTE: First, remove the transmission main mounting bracket on the right side of vehicle, and then tilt the engine unit to remove the left transmission main mounting bracket.
37. Remove the two mounting bolts on the upper side of the transmission.
38. Set the ST (ENGINE HANGER) again to loosen the chain sling. 39. Lift up the vehicle. 40. Place the transmission jack under the transmission. CAUTION: Always support the transmission case with a transmission jack.
41. Remove the bolts and nuts which hold lower side of transmission to engine.
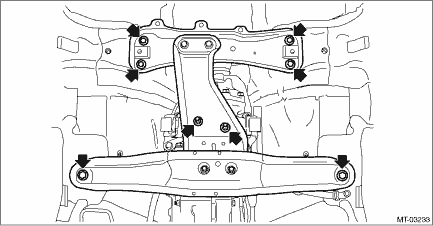
42. Remove the front crossmember and the rear crossmember.
43. Lower the transmission rear end (dust cover rear end). CAUTION: When lowering the transmission rear end, be careful not to let the converter case and steering mechanical parts contact each other. NOTE: Lower the transmission rear end by approx. 80 mm (3.1 in) (reference). 44. Remove the transmission assembly. NOTE: • Move the transmission jack towards the rear until the main shaft is withdrawn from the clutch disc. • Remove it while moving the transmission jack up and down so that the engine and transmission remain directly aligned. 45. Remove the transmission cushion rubber. |


 Installation
1. Replace the oil seal of the differential side retainer. Differential Side Retainer Oil Seal > REPLACEMENTNOTE:• Be sure to replace the oil seal after removing the front drive shaft.• W ...
Other materials:
Preparation tool
1. SPECIAL TOOLILLUSTRATIONTOOL NUMBERDESCRIPTIONREMARKS — (Newly adopted tool)SUBARU SELECT MONITOR 4Used for setting of each function and troubleshooting for electrical system.NOTE:For detailed operation procedures of Subaru Select Monitor 4, refer to “Application help”.2. GENERAL TO ...
