Subaru Legacy BN/BS (2015-2019) Service Manual: Installation
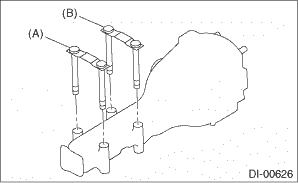
1. Attach the rear differential member plate to the rear differential.
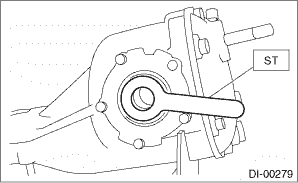
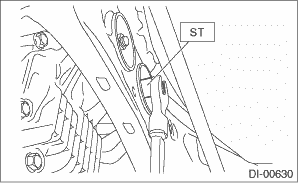
2. Set the rear differential to transmission jack. 3. Set the ST to the rear differential.
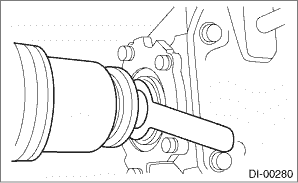
4. Insert the rear drive shaft until the spline portion of the rear drive shaft exceeds the side oil seal.
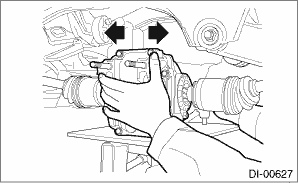
5. Remove ST from rear differential. 6. Push the rear differential from side to side to insert the DOJ into rear differential completely.
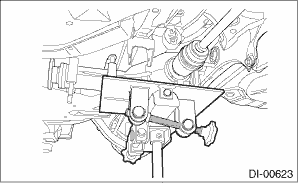
7. Adjust the transmission jack, if necessary, and insert the rear differential stud bolt into rear crossmember bushing properly.
8. After inserting the rear differential stud bolt into the rear crossmember bushing, lift up the transmission jack and align the rear differential to its attachment position.
9. Tighten a new self-locking nut temporarily to rear crossmember.
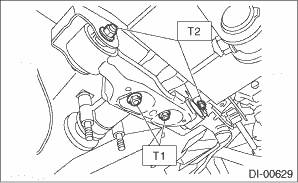
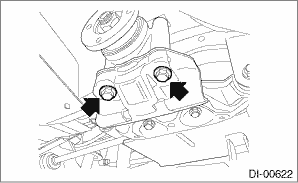
10. Install the rear differential front member with a new self-locking nut. Tightening torque: T1: 50 N·m (5.1 kgf-m, 36.9 ft-lb) T2: 110 N·m (11.2 kgf-m, 81.1 ft-lb)
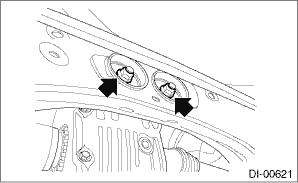
11. Install the mass damper with a new self-locking nut. (2.5 L OUTBACK model) Tightening torque: 50 N·m (5.1 kgf-m, 36.9 ft-lb)
12. Tighten the self-locking nut. NOTE: For models other than OUTBACK model, tighten the self-locking nut using the ST.
Tightening torque: 70 N·m (7.1 kgf-m, 51.6 ft-lb)
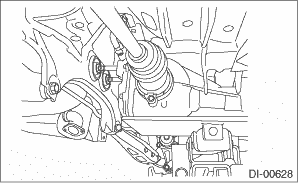
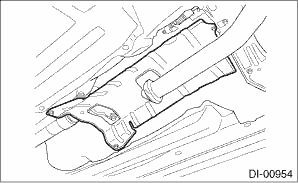
13. Remove the transmission jack. 14. Install the propeller shaft. Propeller Shaft > INSTALLATION 15. Install the heat shield cover. Tightening torque: 18 N·m (1.8 kgf-m, 13.3 ft-lb)
16. Install the rear exhaust pipe. • 2.5 L model Rear Exhaust Pipe > INSTALLATION • 3.6 L model Rear Exhaust Pipe > INSTALLATION 17. Fill differential gear oil. Differential Gear Oil > REPLACEMENT 18. Installing procedure hereafter is in the reverse order of removal. 19. Perform “Rear differential inspection mode” using the Subaru Select Monitor. (CVT model) Rear Differential Inspection Mode CAUTION: Be sure to perform rear differential inspection mode when the following work has been performed. • Replacement of rear differential • Replacement of rear differential hypoid gear set • Replacement of transmission assembly • Replacement of front differential hypoid gear set |
 Adjustment
1. SIDE GEAR BACKLASHAdjust the side gear backlash. Rear Differential (T-type) > ASSEMBLY2. HYPOID DRIVEN GEAR BACKLASHAdjust hypoid driven gear backlash. Rear Differential (T-type) > ASSEMBLY3. TOO ...
 Inspection
Wash all the disassembled parts clean, and examine them for wear, damage and other defects. Repair or replace the defective parts as necessary.1. Hypoid driven gear and drive pinion• If there is ...
Other materials:
Trailer brakes
WARNING
Adequate size trailer brakes are
required when the trailer and its
cargo exceed 1,000 lbs (453 kg)
total weight.
Do not directly connect your
trailer's hydraulic brake system
to the hydraulic brake system in
your vehicle. Direct connection
...
