
Subaru Legacy BN/BS (2015-2019) Service Manual: Installation
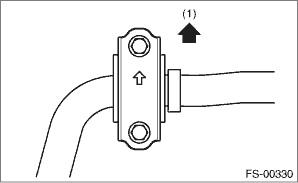
1. Before installation, inspect the following items and replace any faulty part with a new one. • Check the bushing for abnormal cracks, fatigue or damage. • Check the stabilizer link for damage. 2. Install the front stabilizer. CAUTION: • Be careful not to let the dust boot of the stabilizer link turn over or fall off when installing. If a deformed dust boot is installed, the dust boot may be damaged. • The stabilizer bracket has a set orientation. Install it with the arrow mark facing the front side (1) of the vehicle.
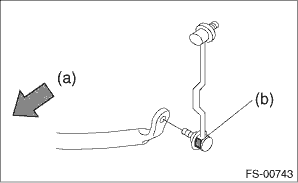
• The stabilizer link RH is different from LH. Therefore, make sure that the stabilizer link is installed correctly by checking the paint mark.
(1) Put the front stabilizer in from the right side of vehicle. (2) Install the right and left stabilizer brackets. Tightening torque: Stabilizer bracket: 25 N·m (2.5 kgf-m, 18.4 ft-lb) (3) Install the right and left stabilizer links. Tightening torque: Stabilizer link: 60 N·m (6.1 kgf-m, 44.3 ft-lb) 3. Install the front under cover. Front Under Cover > INSTALLATION 4. Install the front wheels. Tightening torque: 120 N·m (12.2 kgf-m, 88.5 ft-lb) |
 Removal
1. Lift up the vehicle, and then remove the left and right front wheels.2. Remove the front under cover. Front Under Cover > REMOVAL3. Remove the front stabilizer.(1) Remove the left and right stabil ...
 Front strut
...
Other materials:
Dtc b1502 warning box communication malfunction
DTC DETECTING CONDITION:Communication error between combination meter and spot map lightTROUBLE SYMPTOM:Malfunction of the warning light inside the spot map lightWIRING DIAGRAM:NOTE:For the coupling connector, refer to “WIRING SYSTEM”.Combination meter system Combination Meter System > ...
