Subaru Legacy BN/BS (2015-2019) Service Manual: Installation
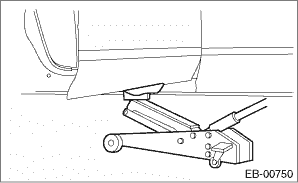
1. REAR DOOR PANEL 1. Put a wooden block and the like on a jack and place the panel assembly - rear door on it.
2. Adjust the height by the jack, and temporarily install the panel assembly - rear door to the upper hinge - rear door and the lower hinge - rear door. NOTE: • When installing the panel assembly - rear door, make sure that a uniform clearance is created around the panel. • Perform installation while paying attention to the assembly direction of the grommet. 3. Adjust the clearance around the panel assembly - rear door. Rear Door > ADJUSTMENT 4. Tighten the mounting bolts of the panel assembly - rear door to the specified torque. Tightening torque: 25 N·m (2.5 kgf-m, 18.4 ft-lb) 5. Tighten the bolts and nuts of the checker assembly - rear door. Tightening torque: Refer to “COMPONENT” of “General Description”. General Description > COMPONENT 6. Connect the door harness connector, and install the harness grommet. 7. Attach the door sash tape. Door Sash Tape > INSTALLATION 8. Before installing each part, check the following items. • Is the lever of the frame assembly - rear door outer is free from deformation- • Is grease applied sufficiently to the lever joints of the latch and actuator assembly - rear. • Is the cable of the latch and actuator assembly - rear free from deformation such as fray. • Is grease applied sufficiently to the cable joints of the latch and actuator assembly - rear- 9. Install door internal parts in the reverse order of removal. • Weather strip - rear door • Handle - door outer Tightening torque: 7.5 N·m (0.8 kgf-m, 5.5 ft-lb) • Latch & actuator assembly - rear Tightening torque: 7.5 N·m (0.8 kgf-m, 5.5 ft-lb) NOTE: Make sure the child safety lock works correctly after installation. • Regulator & motor assembly - rear for the rear door Tightening torque: 7.5 N·m (0.8 kgf-m, 5.5 ft-lb) • Sash COMPL - rear partition, and glass assembly - rear door Tightening torque: 7.5 N·m (0.8 kgf-m, 5.5 ft-lb) • Running channel - rear door CAUTION: Check that the running channel - rear door is securely fixed to the panel assembly - rear door and to the sash COMPL - partition. 10. Install the cover B pillar - rear door INN and the cover C pillar - rear door INN. CAUTION: Always replace with a new part, because engagement of the claw weakens. 11. Install the rear door speaker assembly. 12. Install the sealing cover. Rear Sealing Cover > INSTALLATION 13. Install the trim panel - rear door. Door Trim > INSTALLATION 14. Install the garnish assembly - door. (OUTBACK model) Side Garnish > INSTALLATION 15. Connect the ground terminal to battery sensor. NOTE 2. REAR DOOR HINGE 1. Apply grease to the sliding area of door hinges, and install to vehicle. Tightening torque: 30 N·m (3.1 kgf-m, 22.1 ft-lb) 2. Adjust the height by the jack, and temporarily install the panel assembly - rear door to the upper hinge - rear door and the lower hinge - rear door. NOTE: When installing the panel assembly - rear door, make sure that a uniform clearance is created around the panel. 3. Adjust the clearance around the panel assembly - rear door. Rear Door > ADJUSTMENT NOTE: When installing the panel assembly - rear door, make sure that a uniform clearance is created around the panel. 4. Tighten the bolts of the panel assembly - rear door to the specified torque. Tightening torque: 25 N·m (2.5 kgf-m, 18.4 ft-lb) 5. Connect the door harness connector, and install the harness grommet. 6. Tighten the bolts on the vehicle side of the checker assembly - rear door. Tightening torque: Refer to “COMPONENT” of “General Description”. General Description > COMPONENT 7. Install the garnish assembly - door. (OUTBACK model) Side Garnish > INSTALLATION 8. Connect the ground terminal to battery sensor. NOTE |
 Adjustment
Adjust the clearance around the panel assembly - rear door as follows.PartStandardAPanel assembly - front door to Panel assembly - rear door4.4+1.5, −1.0 mm (0.17+0.06, −0.04 in)BFront doo ...
 Rear gate
...
Other materials:
Assembly
1. Using the ST, install the taper roller bearing (transfer case side).CAUTION:Do not apply a load in excess of 10 kN (1 ton, 1.1 US ton, 1.0 Imp ton).NOTE:Be careful when handling because the taper roller bearing and the outer race are used as a set.ST 927640000INSTALLER(A)Taper roller bearing ( ...
