Subaru Legacy BN/BS (2015-2019) Service Manual: Removal
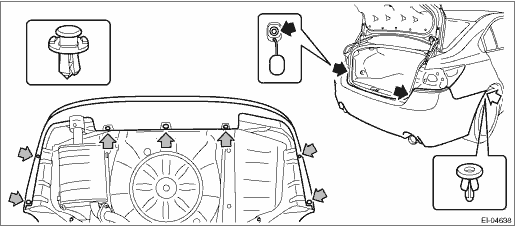
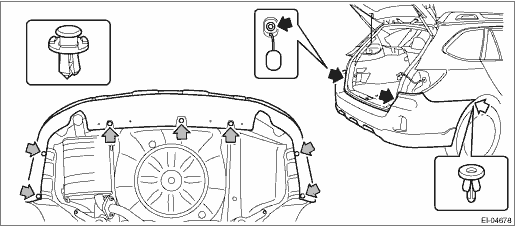
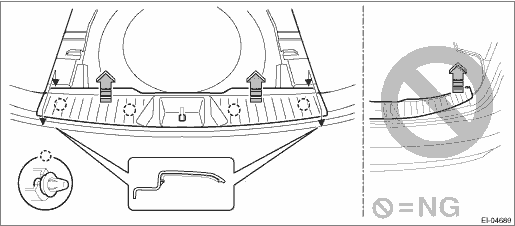
1. SEDAN MODEL 1. Disconnect the ground terminal from battery sensor. NOTE 2. Remove the trunk room mat. 3. Remove the light assembly - rear combination. Rear Combination Light Assembly > REMOVAL 4. Remove the bumper face - rear. (1) Remove the clips inside the wheel housing. (2) Remove the screws from trunk opening. (3) Remove the clips at the lower side of the bumper face - rear.
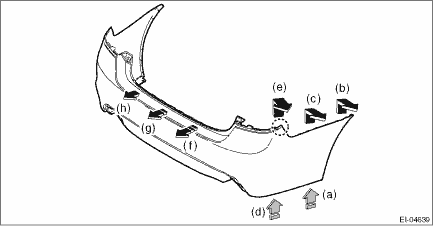
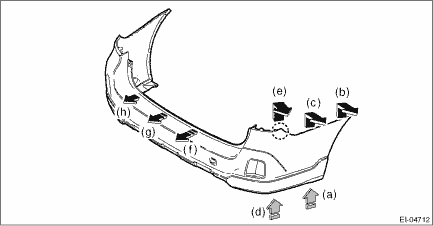
(4) Detach (b) and (c) while pulling up (a) of the bumper face - rear. (5) Detach (e) while pulling up (d) of the bumper face - rear. (6) Detach the opposite side in the same manner. (7) Detach in order from (f) to (h) while pulling up the center part of the bumper face - rear. CAUTION: Do not pull forcibly. It may damage the flange section on the bumper face - rear side when it comes off from the claws of the bracket - rear bumper.
5. Remove the energy absorber foam - rear.
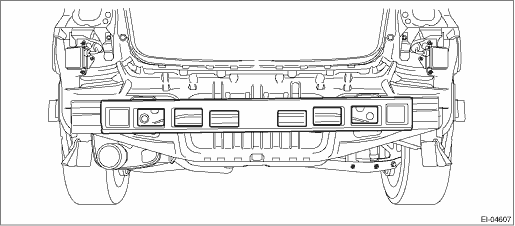
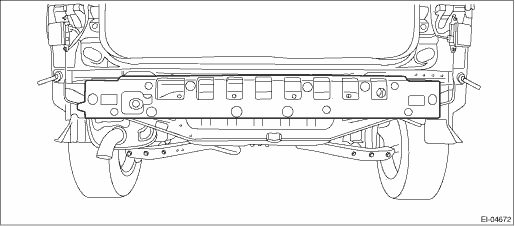
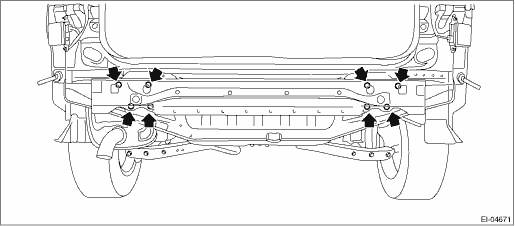
6. Remove the nuts, and remove the bumper beam COMPL - rear.
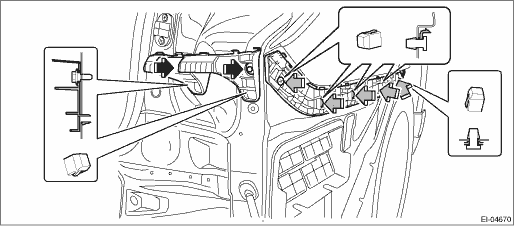
7. Remove bumper brackets. (1) Remove the bolts and screws. (2) Turn over the trim panel - trunk side, and detach the claw of the clip from the back side.
2. OUTBACK MODEL 1. Disconnect the ground terminal from battery sensor. NOTE 2. Remove the light assembly - rear combination. Rear Combination Light Assembly > REMOVAL 3. Remove the bumper face - rear. (1) Remove the clips inside the wheel housing. (2) Remove the screws from rear gate opening. (3) Remove the clips at the lower side of the bumper face - rear.
(4) Detach (b) and (c) while pulling up (a) of the bumper face - rear. (5) Detach (e) while pulling up (d) of the bumper face - rear. (6) Detach the opposite side in the same manner. (7) Detach in order from (f) to (h) while pulling up the center part of the bumper face - rear. CAUTION: Do not pull forcibly. It may damage the flange section on the bumper face - rear side when it comes off from the claws of the bracket - rear bumper.
4. Remove the energy absorber foam - rear.
5. Remove the nuts, and remove the bumper beam COMPL - rear.
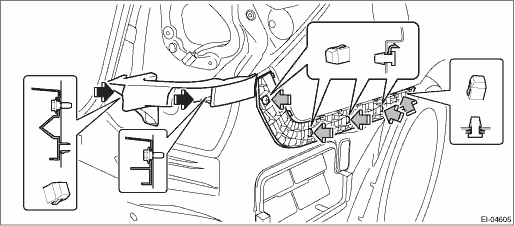
6. Remove bumper brackets. (1) Remove the mat floor - rear, and remove the trim panel - rear skirt. CAUTION: • Do not lift the trim panel - rear skirt from the edge. Doing so may damage the part. • Do not reuse the clips. Once the clip is removed, its holding force is reduced. Be sure to replace it with a new clip.
(2) Remove the trim panel - rear apron. Rear Quarter Trim > REMOVAL (3) Remove the bolts and screws. (4) Detach the claw of the clip from the back side.
|

 Installation
1. SEDAN MODELCAUTION:Before installing the bumper face, match the claws on the bracket - rear bumper with the engaging position of flange section on the bumper face side. If the engaging position is ...

Other materials:
Removal
1. Remove the manual transmission assembly from the vehicle. Manual Transmission Assembly > REMOVAL2. Remove the clutch release lever and the release bearing. Release Bearing and Lever > REMOVAL3. Remove the transfer case together with the extension case assembly. Transfer Case and Extension Case ...
