Subaru Legacy BN/BS (2015-2019) Service Manual: Adjustment
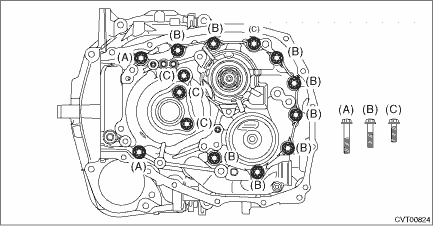
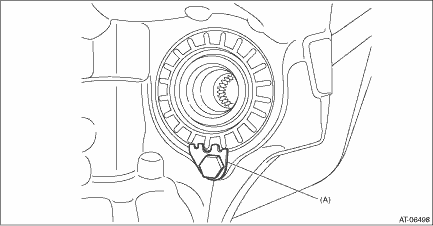
1. Remove the liquid gasket from the mating surface completely. 2. Using the ST, install the drive pinion retainer to converter case.
NOTE: Do not confuse the three different-length bolts when installing. Tightening torque: 43 N·m (4.4 kgf-m, 31.7 ft-lb)
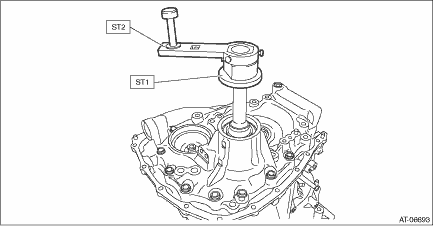
3. Rotate the drive pinion several times using ST1 and ST2.
4. Adjust the drive pinion and hypoid driven gear backlash. Front Differential Assembly > ADJUSTMENT 5. Using the ST, remove the drive pinion retainer from converter case.
6. Apply lead-free red dye evenly on the both sides of three to four teeth of the hypoid driven gear. Then install the drive pinion retainer and rotate the drive pinion in both directions several times. Remove the drive pinion retainer and check the tooth contact pattern. If the teeth contact is inappropriate, adjust the backlash or thickness of the shim. Front Differential Assembly > ADJUSTMENT NOTE: After correction, wipe off the lead-free red dye.
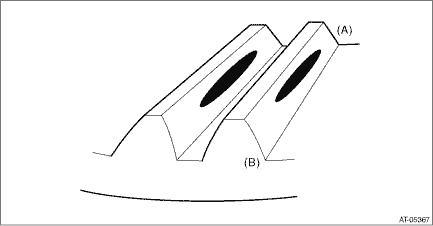
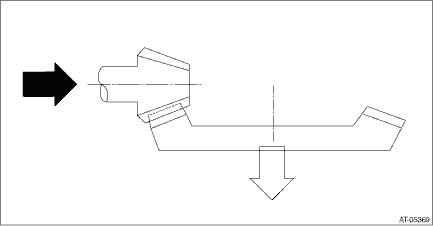
• Correct tooth contact Check item: Tooth contact surface is slightly shifted toward the toe side under a no-load condition. (When driving, it moves towards the heel side.)
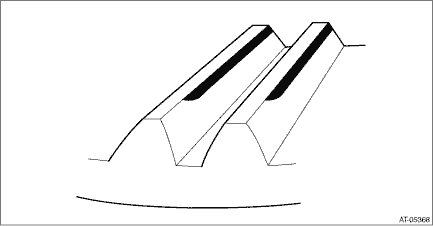
• Face contact Check item: Backlash is too large. Contact pattern
Corrective action: Increase thickness of drive pinion shim according to the procedures for moving the drive pinion close to hypoid driven gear.
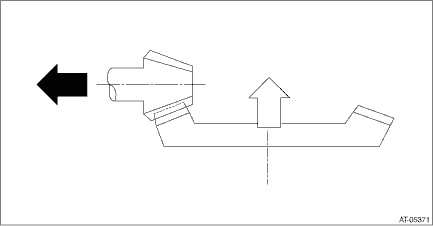
• Flank contact Check item: Backlash is too small. Contact pattern
Corrective action: Reduce the thickness of the drive pinion shim according to the procedures for moving the drive pinion away from the hypoid driven gear.
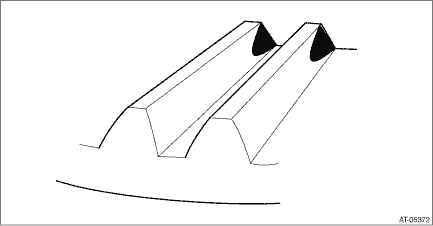
• Toe contact (inside contact) Check item: Teeth contact area is too small. Contact pattern
Corrective action: Reduce the thickness of the drive pinion shim according to the procedures for moving the drive pinion away from the hypoid driven gear side.
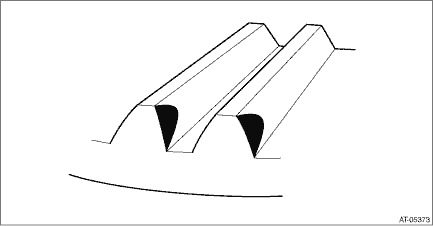
• Heel contact (outside end contact) Check item: Teeth contact area is too small. Contact pattern
Corrective action: Increase the thickness of the drive pinion shim according to the procedures for moving the drive pinion closer to the hypoid driven gear.
7. Using the ST, loosen the differential side retainer until the mounting groove of the O-ring appears, and then install the O-ring. NOTE: • When loosening the differential side retainer, record the number of the turns made. • Perform this for both left and right differential side retainers. • Use new O-rings. • Apply the differential gear oil to O-ring.
8. Using the ST, tighten the retainer to the position before it is loosened.
9. Replace the differential side retainer oil seal with a new part. Differential Side Retainer Oil Seal 10. Install the lock plate. Tightening torque: 25 N·m (2.5 kgf-m, 18.4 ft-lb)
| ||||||||||||||||||||||||||||||||||

 Removal
1. Remove the transmission assembly. Automatic Transmission Assembly > REMOVAL2. Remove the air breather hose. Air Breather Hose > REMOVAL3. Remove the control valve body. Control Valve Body > REMO ...
 Installation
1. Clean the mating surface of drive pinion retainer and converter case.2. Adjust the backlash and tooth contact between drive pinion shaft assembly and the front differential side gear. Drive Pinion ...
Other materials:
Refrigerant recovery procedure procedure
CAUTION:• During operation, be sure to wear protective goggles and protective gloves.• Connect the refrigerant recovery system with the manifold gauge set to discharge the refrigerant from the A/C system and recycle the gas.• When recycling the discharged refrigerant, keep service ...
