Subaru Legacy BN/BS (2015-2019) Service Manual: Adjustment
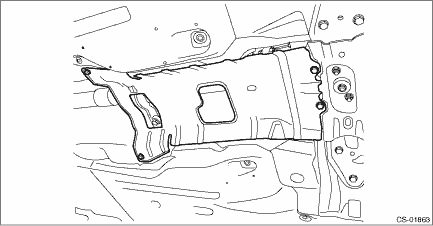
1. Shift the select lever to “N” range. 2. Lift up the vehicle. 3. Remove the center exhaust pipe. (2.5 L model) Center Exhaust Pipe > REMOVAL 4. Remove the front exhaust pipe and rear exhaust pipe. (3.6 L model) Front Exhaust Pipe > REMOVAL Rear Exhaust Pipe > REMOVAL 5. Remove the center exhaust cover.
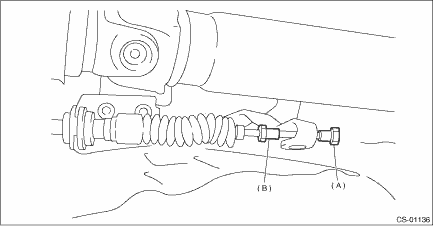
6. Loosen the nuts on both sides.
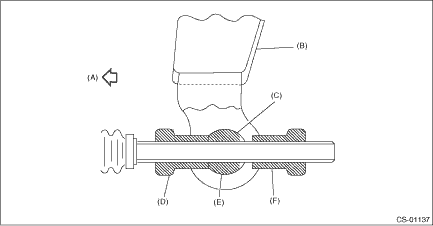
7. Turn the nut B until it lightly touches the connector.
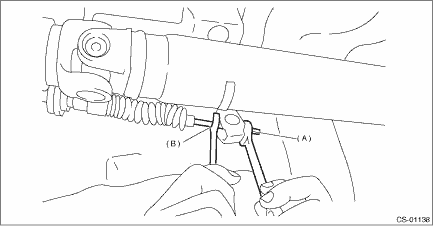
8. Set a spanner wrench to the nut B so that it does not rotate, and then tighten the nut A. Tightening torque: 7.5 N·m (0.8 kgf-m, 5.5 ft-lb)
9. After the completion of adjustment, confirm that the select lever operates normally at all ranges. 10. Install the center exhaust cover. Tightening torque: 18 N·m (1.8 kgf-m, 13.3 ft-lb) 11. Install the center exhaust pipe. (2.5 L model) Center Exhaust Pipe > INSTALLATION 12. Install the front exhaust pipe and rear exhaust pipe. (3.6 L model) Front Exhaust Pipe > INSTALLATION Rear Exhaust Pipe > INSTALLATION |
 Removal
1. Shift the select lever to “N” range.2. Disconnect the ground terminal from battery sensor. NOTE3. Lift up the vehicle.4. Remove the center exhaust pipe. (2.5 L model) Center Exhaust P ...
 Installation
1. Position the select cable as shown in the figure, and install it to the plate assembly.CAUTION:• If the cable is installed in the wrong direction, loosen the bracket bolts, and then reinstall ...
Other materials:
Specification
1. CONDITIONS FOR COMPLETION OF ABS SEQUENCE CONTROLWhen the following conditions develop, the ABS sequence control stops and ABS operation is returned to the normal control mode.• When the speed of at least one wheel reaches 10 km/h (6.2 MPH).• When the brake pedal is released during AB ...
