Subaru Legacy BN/BS (2015-2019) Service Manual: Installation
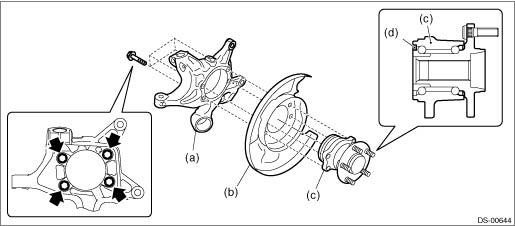
1. Place the back plate - rear brake between the housing assembly - rear axle and the hub unit COMPL - rear axle, and tighten the bolt. CAUTION: • Do not get closer the tool which charged magnetism to magnetic encoder. • Be careful not to damage the magnetic encoder. Tightening torque: 65 N·m (6.6 kgf-m, 47.9 ft-lb)
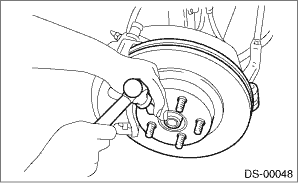
2. Install the rear drive shaft assembly. CAUTION: Do not hammer the drive shaft assembly when installing. (1) Insert the drive shaft assembly into the hub spline, and pull it into the specified position. (2) Tighten the new nut - axle temporarily. 3. Install the disc rotor to the hub unit COMPL - rear axle. 4. Install the caliper body assembly to the housing assembly - rear axle. Tightening torque: 66 N·m (6.7 kgf-m, 48.7 ft-lb) 5. Install the brake hose bracket. Tightening torque: 33 N·m (3.4 kgf-m, 24.3 ft-lb) 6. Install the rear ABS wheel speed sensor. Tightening torque: 7.5 N·m (0.8 kgf-m, 5.5 ft-lb) 7. While depressing the brake pedal, tighten new nuts - axle to the specified torque. CAUTION: Do not load the rear axle before tightening the nut - axle. Doing so may damage the hub unit COMPL. Tightening torque: 240 N·m (24.5 kgf-m, 177 ft-lb) 8. After tightening the nut - axle, lock it securely.
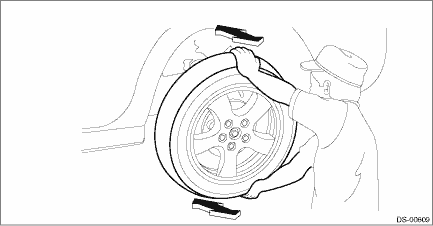
9. Install the rear wheels, and perform the following inspections. Tightening torque: 120 N·m (12.2 kgf-m, 88.5 ft-lb) (1) Check the wheels for smooth rotation. (2) Check that there is no play by moving the upper and lower portions of rear tire in an axial direction with the brake pedal released. • Play exists > Check the hub unit COMPL - rear axle. Rear Hub Unit Bearing > INSPECTION
|
 Assembly
1. Install the hub unit COMPL - rear axle to the ST securely.Preparation tool:ST: HUB STAND (28099PA080)(1)Hub unit COMPL - rear axle2. Using a press, press new bolts - hub (b) until their seating sur ...
 Inspection
1. Moving the rear tire up and down by hand, check there is no backlash in bearing, and check the wheel rotates smoothly.CAUTION:If there is any fault in the bearing, replace the hub unit COMPL - rear ...
Other materials:
Removal
WARNING:Place “NO OPEN FLAMES” signs near the working area.CAUTION:• Be careful not to spill fuel.• Catch the fuel from the tubes using a container or cloth.• If the fuel gauge indicates that two thirds or more of the fuel is remaining, be sure to drain fuel before star ...


