
Subaru Legacy BN/BS (2015-2019) Service Manual: Installation
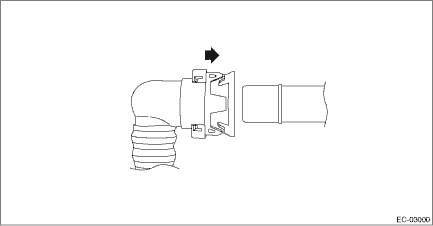
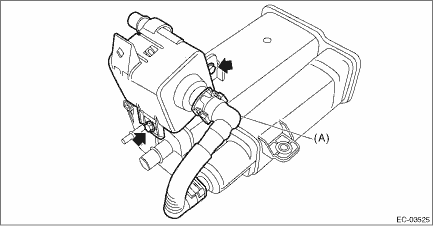
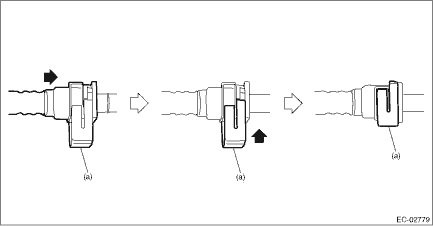
1. Install the leak check valve assembly to the canister. Tightening torque: 8 N·m (0.8 kgf-m, 5.9 ft-lb) 2. Connect the drain tube (A). CAUTION: • Check that there is no damage or dust on the quick connector. If necessary, clean the seal surface of the pipe. • Make sure that the quick connector is securely connected. NOTE: Connect the quick connector as shown in the figure.
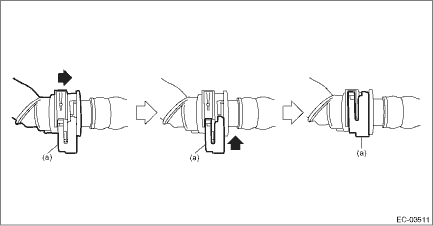
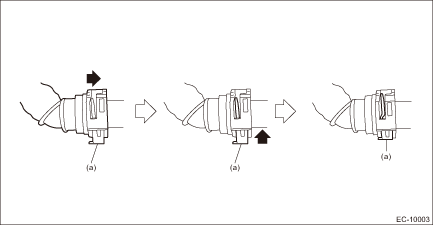
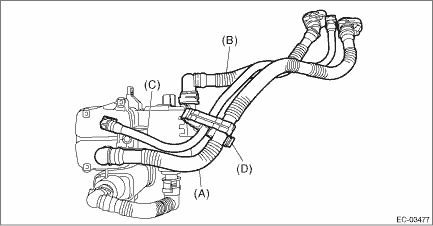
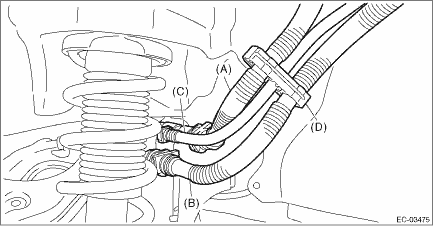
3. Connect the vent tube (A), canister drain tube (B) and purge tube (C), and install the hose clamp (D). CAUTION: • Make sure there are no damage or dust on connections. If necessary, clean the seal surface of the pipe. • Make sure that the quick connector is securely connected. NOTE: Connect the quick connector as shown in the figure. • Vent tube (A) and canister drain tube (B) (Slider color is red or green.)
• Vent tube (A) and canister drain tube (B) (Slider color is white.)
• Purge tube (C)
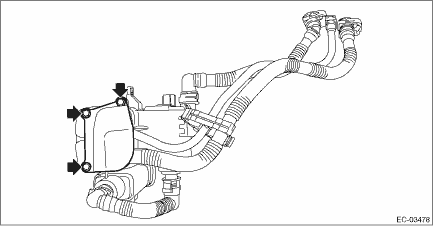
4. Install the canister protector. Tightening torque: 8 N·m (0.8 kgf-m, 5.9 ft-lb)
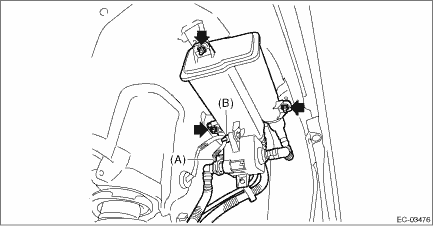
5. Install the canister. Tightening torque: 8 N·m (0.8 kgf-m, 5.9 ft-lb) 6. Connect the connector (A) to the canister and install the harness clip (B).
7. Connect the quick connectors of the vent tube (A), canister drain tube (B) and purge tube (C), and install the tube clamp (D). CAUTION: • Make sure there are no damage or dust on connections. If necessary, clean the seal surface of the pipe. • Make sure that the quick connector is securely connected. NOTE: Connect the quick connector as shown in the figure. • Vent tube (A) and canister drain tube (B) (Slider color is red or green.)
• Vent tube (A) and canister drain tube (B) (Slider color is white.)
• Purge tube (C)
8. Install the rear mud guard LH. Mud Guard > INSTALLATION 9. Lower the vehicle. 10. Install the rear wheel LH. Tire and Wheel > INSTALLATION 11. Connect the ground terminal to battery sensor. NOTE |
 Inspection
1. Check that the canister has no deformation, cracks or other damages.2. Check that the tube has no cracks, damage or loose part. ...
 Drain filter
...
Other materials:
Removal
1. Remove the engine from the vehicle. Engine Assembly > REMOVAL2. Remove the intake manifold assembly. Intake Manifold Assembly > REMOVAL3. Remove the engine wiring harness. Engine Wiring Harness > REMOVAL4. Remove the chain cover. Chain Cover > REMOVAL5. Remove the rocker cover. Rocker Cover ...
