
Subaru Legacy BN/BS (2015-2019) Service Manual: Removal
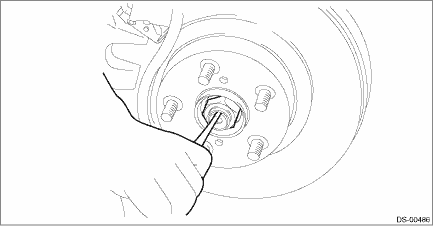
1. Disconnect the ground terminal from battery sensor. NOTE 2. Lift up the vehicle, and then remove the rear wheels. 3. Remove the nut - axle. CAUTION: Do not loosen the nut - axle while the rear axle is loaded. Doing so may damage the hub unit COMPL. (1) Lift the crimped section of the nut - axle. (2) Remove the nut - axle using a socket wrench while depressing the brake pedal.
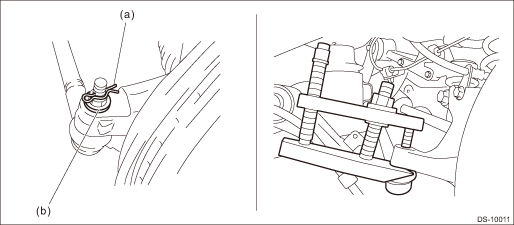
4. Remove the sensor assembly - headlight beam leveler. (Model with auto headlight beam leveler) Rear Height Sensor > REMOVAL 5. Remove the lateral link assembly - rear. Rear Lateral Link > REMOVAL 6. Remove the rear disc rotor. Rear Disc Rotor > REMOVAL 7. Remove the rear drive shaft assembly. Rear Drive Shaft > REMOVAL 8. Remove the lateral link assembly - front. (1) Remove the snap pin (a) and nut (b). (2) Remove the ball joint from the housing assembly - rear axle. CAUTION: Use a tool appropriate to the structure, and be careful not to damage the boot of the joint while removing. The boot may be damaged depending on the tool used. Preparation tool: Tie-rod ball joint puller
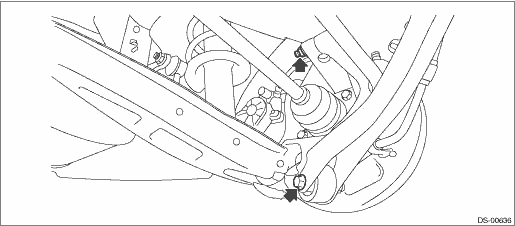
9. Remove the housing assembly - rear axle. CAUTION: • Be careful of the weight of the housing assembly - rear axle. • Be careful not to damage the spline portion of the drive shaft. (1) Remove the bolts, and disconnect the upper arm and trailing link.
(2) Remove the housing assembly - rear axle. 10. Refer to “Rear Hub Unit Bearing” for removal of the hub unit COMPL - rear axle. Rear Hub Unit Bearing > REMOVAL |
 Rear axle
...
 Assembly
1. BUSHING - REAR AXLE HOUSINGDo not remove the housing assembly - rear axle because the bushing - rear axle housing cannot be replaced. If it is removed, replace the housing assembly - rear axle.2. B ...
Other materials:
Removal
1. SEDAN MODEL1. Disconnect the ground terminal from the battery sensor, and wait for at least 60 seconds before starting work. NOTE2. Remove the trim panel assembly - rear shelf. Rear Shelf Trim > REMOVAL3. Remove the light assembly - high-mounted.(1) Disconnect the connector.(2) Remove the lock ...
