Subaru Legacy BN/BS (2015-2019) Service Manual: Removal
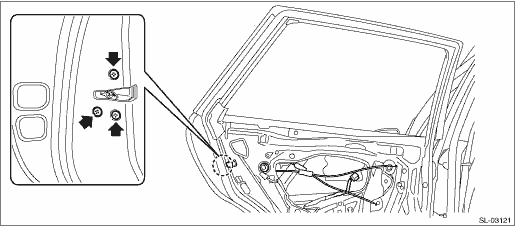
1. Raise the glass assembly - rear door to the top position. 2. Disconnect the ground terminal from battery sensor. NOTE 3. Remove the trim panel - rear door. Door Trim > REMOVAL 4. Remove the sealing cover - rear door. Rear Sealing Cover > REMOVAL 5. Remove the screws and move downward the latch & actuator assembly - rear.
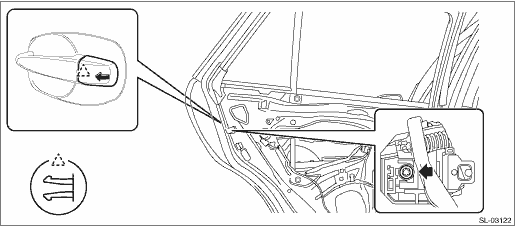
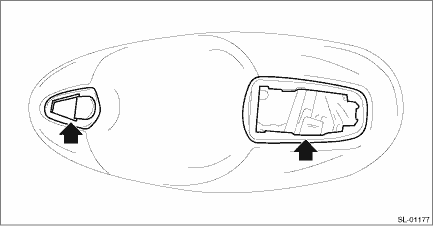
6. Remove the cover - handle rear outer. Preparation tool: TORX® T30 (1) Loosen the TORX® bolt. (2) Release the claws, and then remove the cover - handle rear outer.
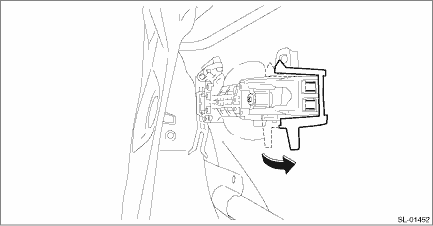
7. Remove the holder of the frame assembly - rear door outer.
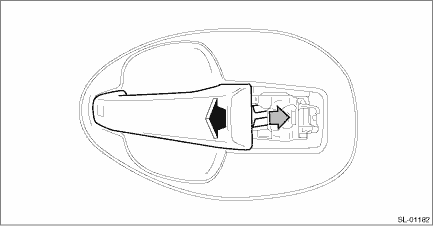
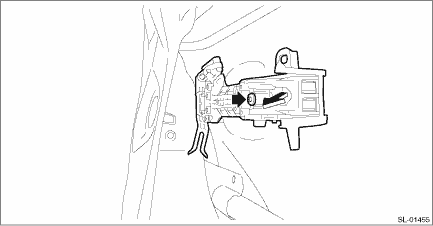
8. Remove the handle - door outer. CAUTION: Do not apply excessive force to remove the handle - door outer from the frame assembly - rear door. (1) Pull the handle - door outer rearward to release engagement of the frame assembly - rear door outer. (2) Pull the handle - door outer towards yourself to remove the handle - door outer.
9. Remove the frame assembly - rear door outer. Preparation tool: TORX® T30 (1) Remove the spacer - door handle outer.
(2) Loosen the TORX® bolt and remove the frame assembly - rear door outer.
|

 Inspection
Check if the outer handle operates normally.If the lever is faulty, replace the handle - door outer. ...
Other materials:
Maximum load limits
WARNING
Never exceed the maximum load
limits explained in the following.
Exceeding the maximum load limits
could cause personal injury and/or
vehicle damage.
CAUTION
Adequate size trailer brakes are
required when the trailer and its
cargo ...
