Subaru Legacy BN/BS (2015-2019) Service Manual: Assembly
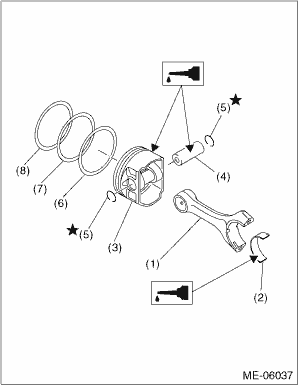
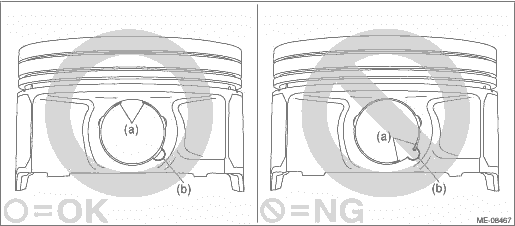
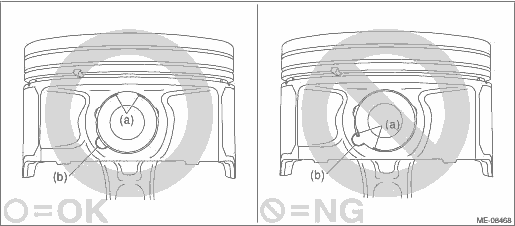
1. Apply engine oil to the surface of the connecting rod bearing. Attach the connecting rod bearing to the connecting rod. 2. Install the circlip on one end of the piston using a flat tip screwdriver. NOTE: • Be careful not damage the piston, by wrapping the tip of flat tip screwdriver with tape. • Make sure the circlip is firmly inserted into the circlip groove. • After installing the circlip, rotate the circlip so that its end part (a) and the cutout portion of circlip groove (b) do not match.
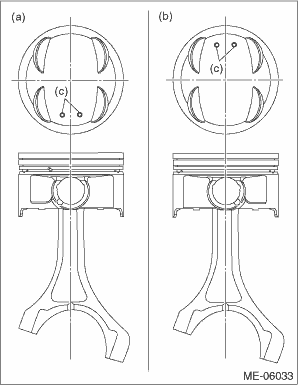
3. Set the piston to the connecting rod. NOTE: Align the front mark of piston and the connecting rod direction correctly as shown in the figure.
4. Apply engine oil to the piston pin, and attach the piston pin. 5. Install the circlip on the piston using a flat tip screwdriver. NOTE: • Be careful not damage the piston and piston pin, by wrapping the tip of flat tip screwdriver with tape. • Make sure the circlip is firmly inserted into the circlip groove. • After installing the circlip, rotate the circlip so that its end part (a) and the cutout portion of circlip groove (b) do not match.
6. Install the oil ring upper rail, expander and lower rail by hand. 7. Install the second ring and top ring using piston ring expander. 8. Install the plug and orifice to the cylinder block as necessary. General Description > COMPONENT |
 Removal
NOTE:Before conducting this procedure, drain the engine oil completely.1. Remove the engine from vehicle. Engine Assembly > REMOVAL2. Remove the crank pulley. Crank Pulley > REMOVAL3. Remove the cha ...
 Installation
1. After setting the cylinder block to ST, install the crankshaft bearing.ST 18232AA000ENGINE STANDNOTE:Apply a coat of engine oil to the bearing and crankshaft journal.2. Mount the crankshaft in c ...
Other materials:
Assembly
(1)Exhaust valve(6)Valve spring seat(11)Valve collet(2)Intake valve(7)Intake valve oil seal(12)Valve shim(3)Cylinder head(8)Exhaust valve oil seal(13)Roller rocker arm pivot(4)Intake valve guide(9)Valve spring(14)Roller rocker arm(5)Exhaust valve guide(10)Valve spring retainer 1. Using the ST, inst ...
