Subaru Legacy BN/BS (2015-2019) Service Manual: Installation
1. Replace the rear differential side oil seal. Rear Differential Side Oil Seal > REPLACEMENT NOTE: After pulling out the drive shaft assembly, be sure to replace with a new oil seal. 2. Insert the drive shaft assembly into the rear hub spline, and pull it into the specified position. CAUTION: • Be careful not to damage the magnetic encoder. • Do not get closer the tool which charged magnetism to magnetic encoder. • Do not hammer the drive shaft assembly when installing.
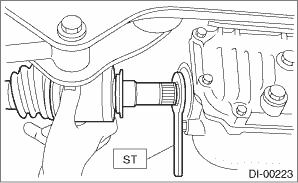
3. Temporarily tighten the nut - axle. 4. Using the ST, install the rear drive shaft assembly to the rear differential. Preparation tool: ST: OIL SEAL PROTECTOR (28099PA090)
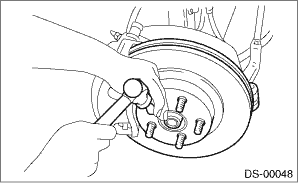
5. Install the rear differential assembly to the rear sub frame assembly. CAUTION: Be sure to use a new self-locking nut. Tightening torque: Differential assembly — bushing - differential: 70 N·m (7.1 kgf-m, 51.6 ft-lb) Differential assembly — rear sub frame assembly: 110 N·m (11.2 kgf-m, 81.1 ft-lb) 6. Install the sensor assembly - headlight beam leveler. (Model with auto headlight beam leveler) Tightening torque: 7.5 N·m (0.8 kgf-m, 5.5 ft-lb) 7. While pressing the brake pedal, tighten the new axle nuts to the specified torque. CAUTION: Do not load the rear axle before tightening the nut - axle. Doing so may damage the hub unit COMPL. Tightening torque: 240 N·m (24.5 kgf-m, 177 ft-lb) 8. Lock the nut - axle securely.
9. Fill differential gear oil. 10. Install the rear wheels. Tightening torque: 240 N·m (24.5 kgf-m, 177 ft-lb) 11. Perform reinitialization of the auto headlight beam leveler system. (Model with auto headlight beam leveler) Auto Headlight Beam Leveler System > PROCEDURE |
 Assembly
CAUTION:Wrap shaft splines with vinyl tape to protect the boot from scratches.NOTE:Use specified grease.BJ, EBJ side:NKG814DOJ side:NKG8141. Install the BJ or EBJ boot in specified position, and fill ...
 Inspection
Check the removed parts for damage, wear, corrosion etc. Repair or replace if defective.• DOJ (Double Offset Joint):Check for seizure, corrosion, damage, wear and excessive play.• EBJ (Hig ...
Other materials:
Removal
1. Disconnect the ground terminal from battery sensor. NOTE2. Remove the center grille assembly. Air Vent Grille > REMOVAL3. Remove the heater control assembly. Control Panel > REMOVAL4. Remove the audio assembly.(1) Remove the screws and clips.(2) Disconnect the connector and remove the audio as ...


