Subaru Legacy BN/BS (2015-2019) Service Manual: Removal
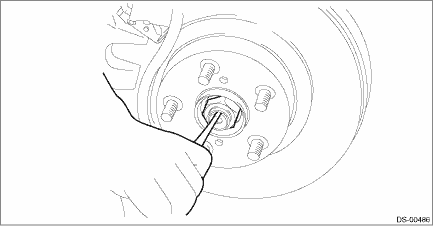
1. Disconnect the ground terminal from battery sensor. NOTE 2. Lift up the vehicle, and then remove the rear wheels. 3. Remove the nut - axle. CAUTION: Do not loosen the nut - axle while the rear axle is loaded. Doing so may damage the hub unit COMPL. (1) Lift the crimped section of the nut - axle. (2) Remove the nut - axle using a socket wrench while depressing the brake pedal.
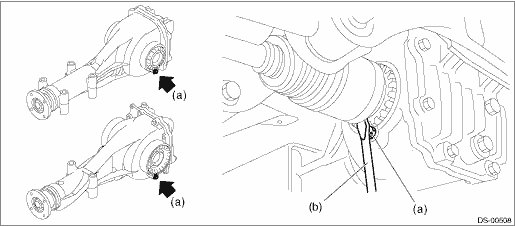
4. Remove the sensor assembly - headlight beam leveler. (Model with auto headlight beam leveler) Rear Height Sensor > REMOVAL 5. Drain differential gear oil. 6. Remove the propeller shaft. Propeller Shaft > REMOVAL 7. Loosen the joint of rear differential assembly and rear drive shaft assembly. • T type: Pull out the rear drive shaft assembly by fitting the ST to the bolt (a) as shown in the figure. CAUTION: Fit the ST to the bolts as shown in the figure to prevent damage of the side bearing retainer. Preparation tool: ST: DRIVE SHAFT REMOVER (28099PA100)
• VA type: Pull out the rear drive shaft assembly by fitting the tire lever (b) to the bolt (a) as shown in the figure. CAUTION: To prevent damage to the side bearing retainer, use by placing the tire lever against the bolt as shown in the figure. Preparation tool: Tire lever
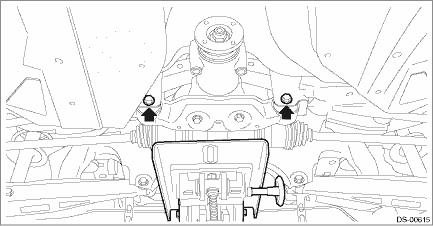
8. Remove the installation section of rear differential assembly. (1) Support the rear differential assembly with a transmission jack. (2) Remove the bolts which hold the rear differential front crossmember from the rear sub frame assembly.
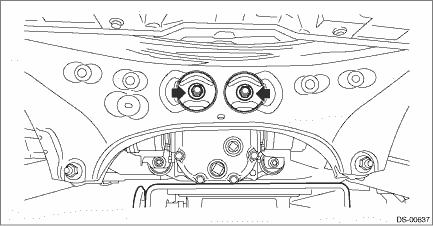
(3) Remove the self-locking nuts which hold the rear differential to the rear sub frame assembly.
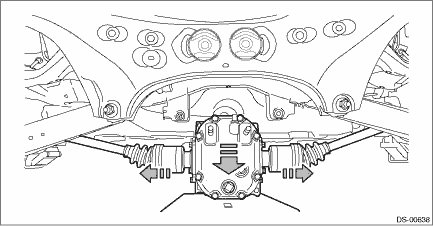
9. Completely pull out the rear drive shaft assembly while lowering the rear differential. CAUTION: Pay attention to avoid damaging the boot of drive shaft.
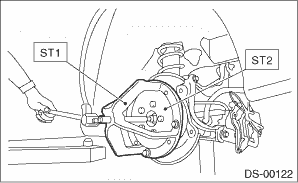
10. Remove the rear drive shaft assembly from the housing assembly - rear axle. NOTE: If it is hard to remove, use the ST. Preparation tool: ST1: AXLE SHAFT PULLER (926470000) ST2: AXLE SHAFT PULLER PLATE (28099PA110)
|
 Rear drive shaft
...
 Assembly
CAUTION:Wrap shaft splines with vinyl tape to protect the boot from scratches.NOTE:Use specified grease.BJ, EBJ side:NKG814DOJ side:NKG8141. Install the BJ or EBJ boot in specified position, and fill ...
Other materials:
Dtc p2272 o2 sensor signal biased/stuck lean bank 2 sensor 2
DTC DETECTING CONDITION:Detected when two consecutive driving cycles with fault occur.CAUTION:After servicing or replacing faulty parts, perform Clear Memory Mode Clear Memory Mode > OPERATION, and Inspection Mode Inspection Mode > PROCEDURE.WIRING DIAGRAM:• Engine Electrical System ENGINE T ...

